Lens Mounts
The E9 lens mounting system is designed for full-frame image sensors. It supports both manual and active lens mounts, the latter of which can be controlled by SLOW.
The E9 ships with the manual Nikon F/G lens mount as standard. Other types of mounts are available as options.
Lens mounts are interchangeable in the field and retain their flange distance for mounting / remounting. Correct flange distance is shimmed at the factory for each lens mount when paired with an E9.
For additional lens mounts ordered after the camera ships, an initial backfocus by users might be necessary for that new mount.
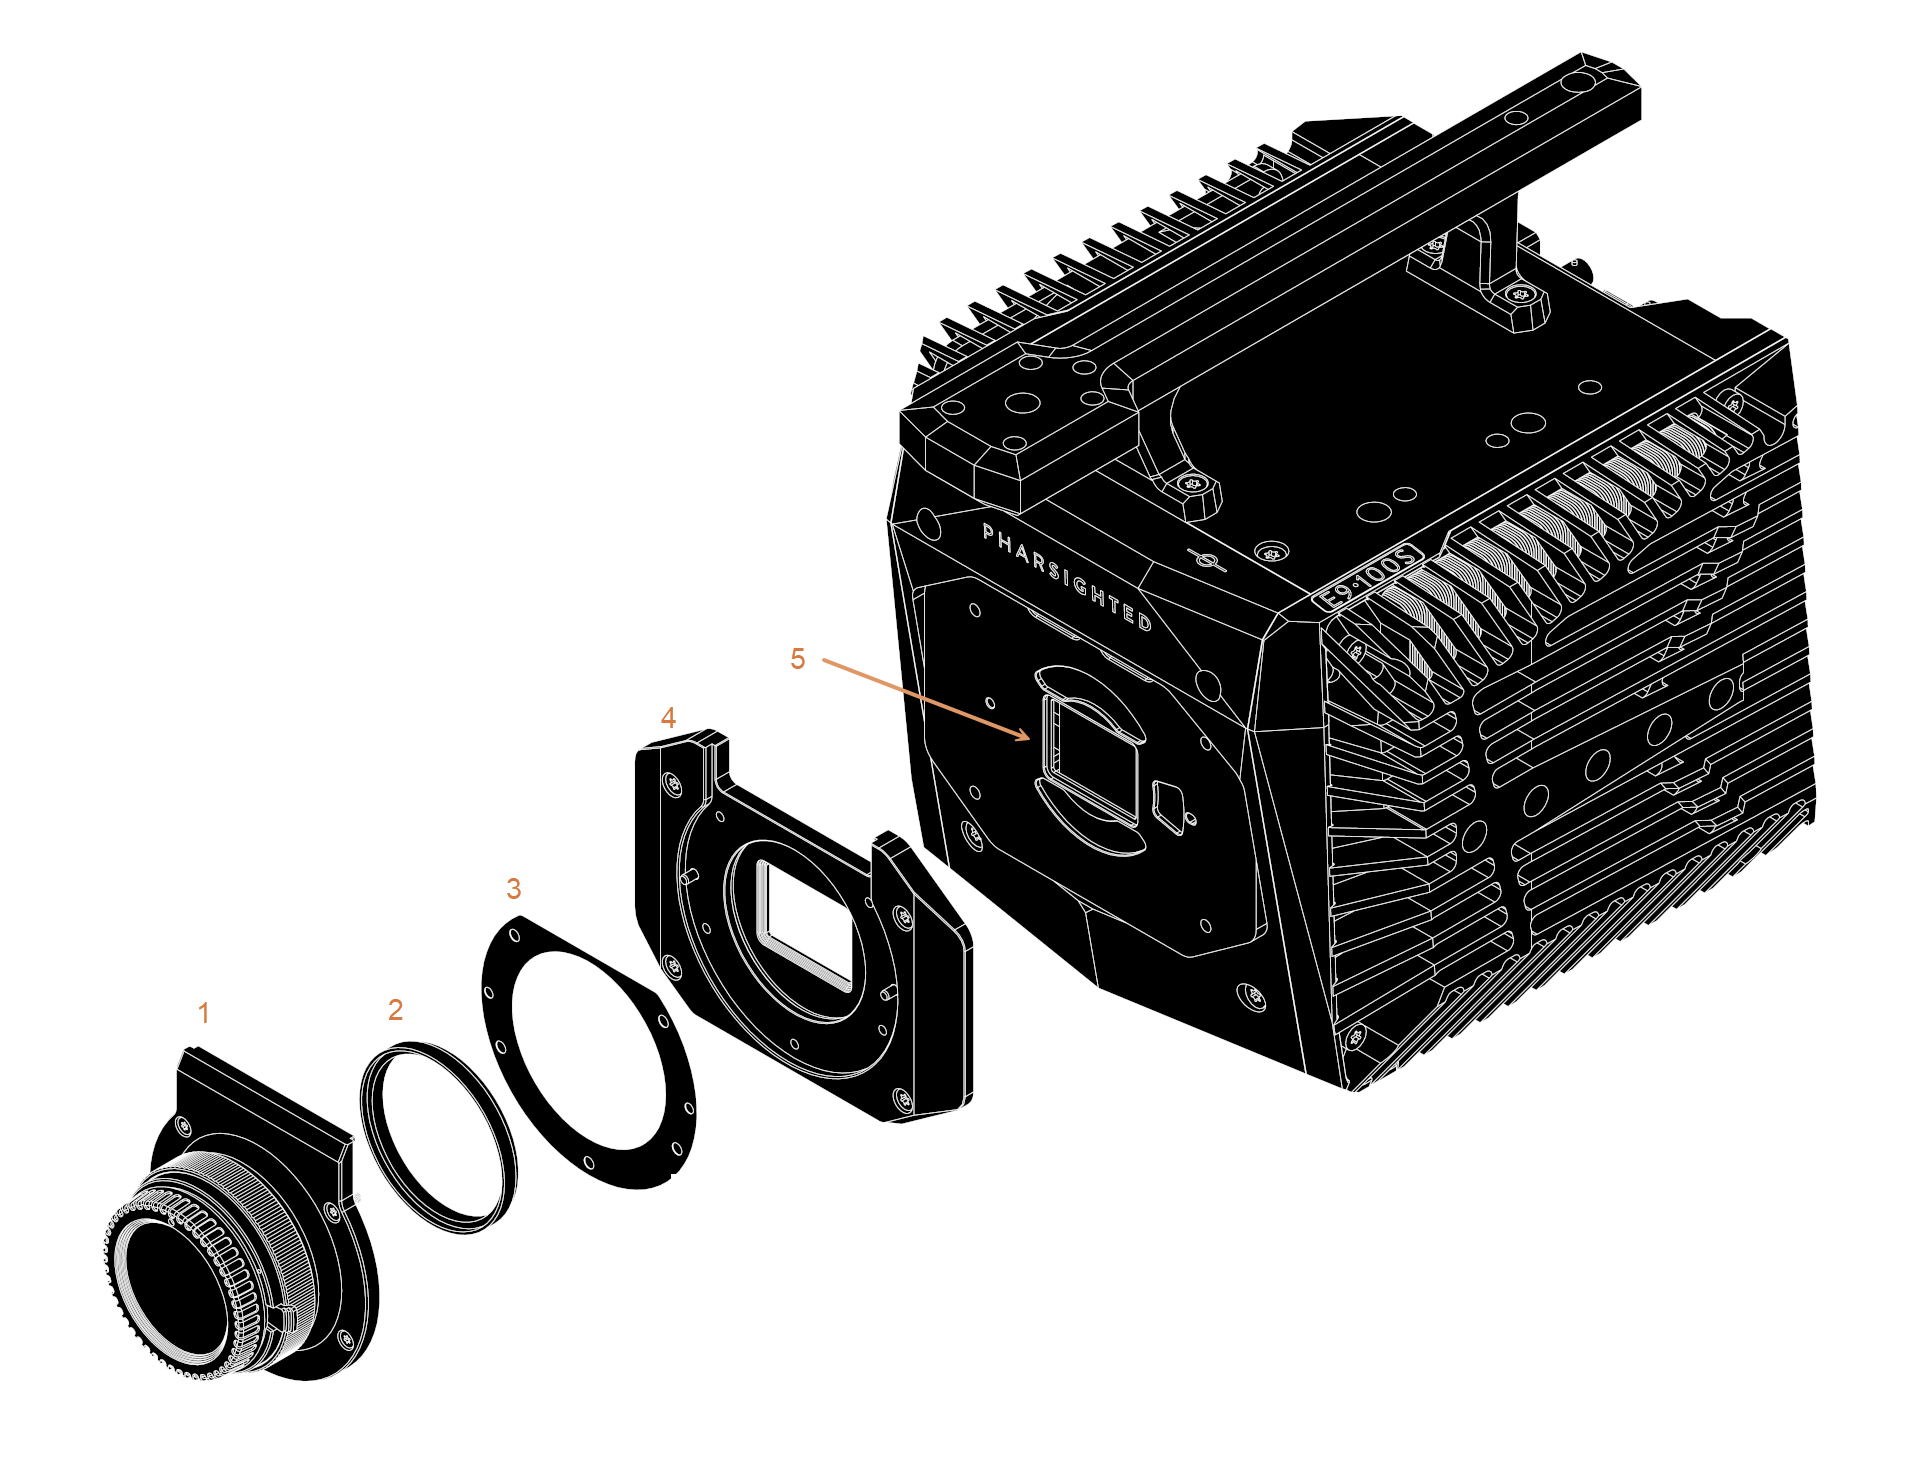
| Item # | Part | Description |
|---|---|---|
| 1 | Lens Mount Adapter | Adapts the lens hardware to the camera hardware |
| 2 | 58mm Filter | Optional optical filter |
| 3 | Shims | To be added or removed to achieve proper flange focal distance (back-focus) |
| 4 | Lens Mount Passive Plate | Allows hotswapping of mounts once an initial shimming has been performed with selected lens and camera combination. |
| 5 | Internal Mechanical Shutter | Used to place the sensor in total darkness for black references or to protect during lens mount service |
Data ports for active mounts are located above the sensor and spring loaded on the lens mount itself. These ports are only enabled when an active lens mount is present, the E9 will autodetect this.
The internal shutter to the E9 is controlled via the SLOW software. Its primary function is for black referencing the sensor. It can also be used to protect the sensor during lens or lens mount changes, by selectively closing it via the SLOW software.
Do not attempt to physically restrict the movement of the shutter in anyway.
Mount Types
E9 supports multiple lens mounts, including active mounts, which allow for electronic control of settings such as focus & aperature via SLOW.
| Type | Brand | Full Frame | Active |
|---|---|---|---|
| F / G | Nikon | Yes | No |
| EF | Canon | Yes | Yes |
| C | - | No | No |
When a lens is not installed, the body cap should always be installed in the lens mount
When mounting an E9 vertically, such as to a microscope, take great care in supporting the camera properly.
Do not mount a camera by its lens mount alone.
Internal Filter
All lens mounts share a common filter plate, where a 58mm screw-type filter can be optionally installed, between the lens and the sensor (re-shimming required). Lens mounts are positioned directionally to the camera by a pair of locator pins on the back side of each mount.
When installing an internal filter, the back-focus may need to be re-checked and adjusted.
Internal filters cannot be used if installing a C-mount lens.
Changing Mounts
Lens mounts are interchangeable in the field and retain their flange distance for mounting / remounting. Correct flange distance is shimmed at the factory for each lens mount when paired with an E9.
E9 should always have a lens mount installed for storage and travel to prevent damage to the sensor.
Removal
- Close the shutter
- Power down the camera and remove all power sources
- Remove all 4 M4x12mm screws from the mount
- Remove the mount and store safely
Extra screws are provided in the shim kit if one is lost
It is highly recommended to close the shutter prior to changing lens mounts to prevent damage to the sensor.
Do NOT replace any screw with one greater than 12mm in length!
Do NOT change lens mounts while the camera is powered on. This could permanently damage the camera!
Installation
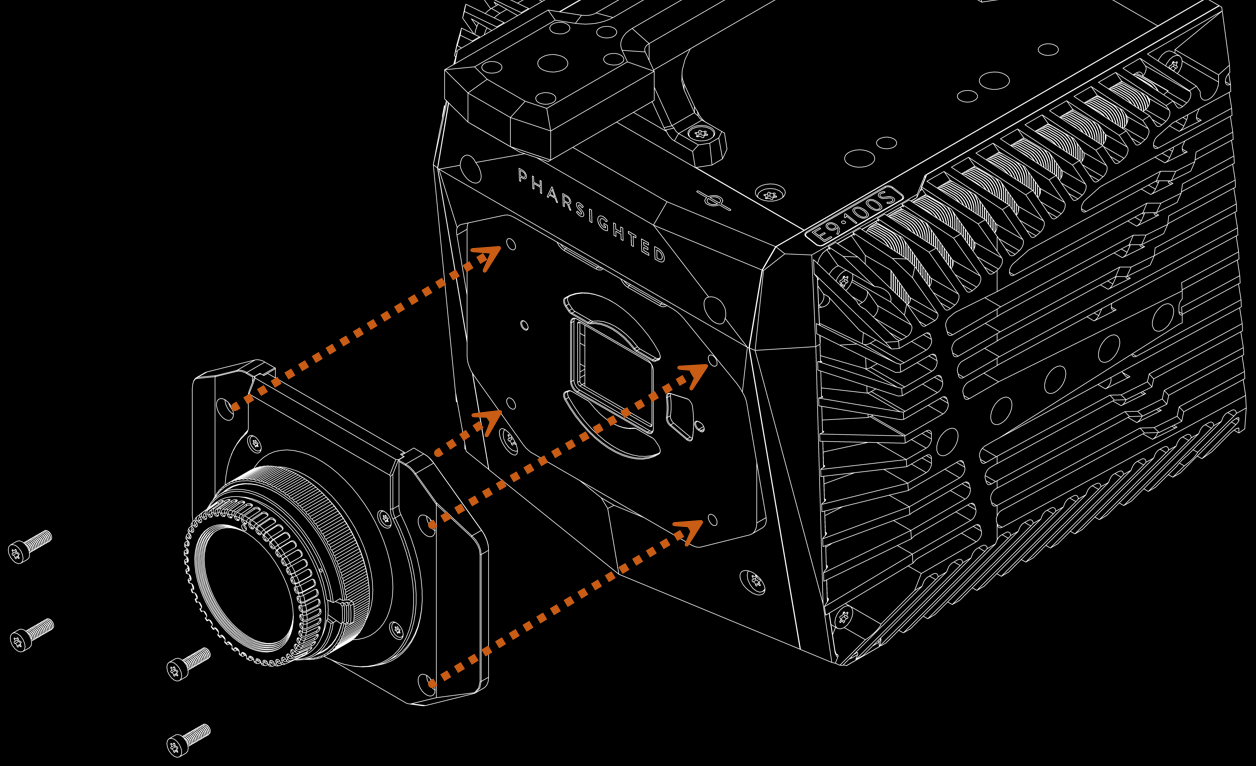
- Insert the lens mount, taking care to align the two lens mount guide pins on installation
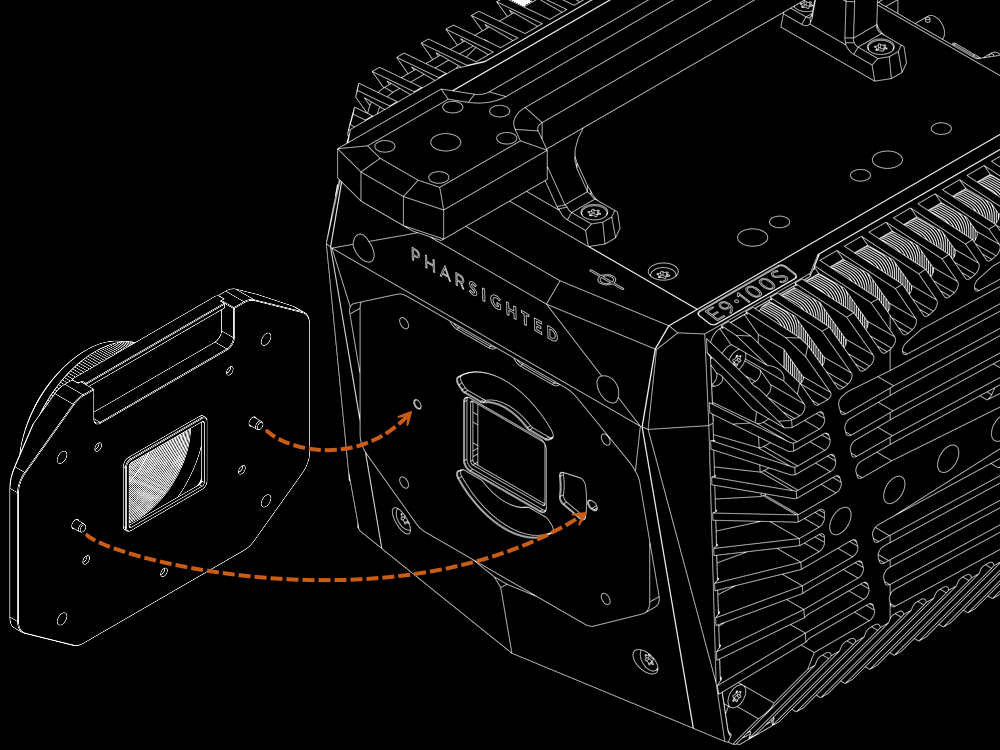
- Install all 4 M4 x 12mm screws and torque to 20in/lbs (2.25 N-m)
Active mounts will be automatically recognized
Back-focusing
With a properly set flange, a lens’ actual focus distance will equal what the focus ring of the lens is set to, measuring from the image plane mark on the top of the camera.
If a lens cannot focus at infinity, the flange distance is too large.
If a lens focuses too soon (i.e. lens is set to 10’ but focuses at 5’) the flange distance is too short.
To alter the flange distance, the lens mount must be disassembled and shims must be added or subracted. With calibration of the focal plane, magnification of an image will increase with added shims.
There are additional shims in the shim kit included with an E9.

Instructions
- Close the shutter and power down the camera.
- Remove the five M3x8mm screws with a T10 driver.
- Add or subtract shims. (see shim value chart below)
- Re-assemble mount and re-install the five screws, torquing to 10in-lbs (1.13N·m).
- Boot camera and test the flange distance.
- Repeat the process as necessary to achieve an acceptable value.
Shim Values
| Color | Thickness (mm) |
|---|---|
| Red | 0.05 |
| Beige | 0.10 |
| Steel | 0.50 |
Third-Party Custom Mounts
The hard flange of the E9 system is 8.0mm. Due to the structure of the E9 sensor, expect to add +0.7mm of shim from the nominal value of a lens system, i.e. Nikon F nominal is 46.50mm, the E9 will require ~47.20 total flange distance.
It is best to design for a nominal distance and then shim to the actual. Use of the location posts is encouraged.
The integration of third-party active mounts is not supported currently.
The screw thread insertion depth should not exceed 7.5mm. Longer thread insertion can damage the internal components of the camera. Ideally the amount of material under the shoulder of the screw should be either 3 or 5mm. Using a 10 or 12mm screw, respectively, is ideal.