Mounting
Mounting Points
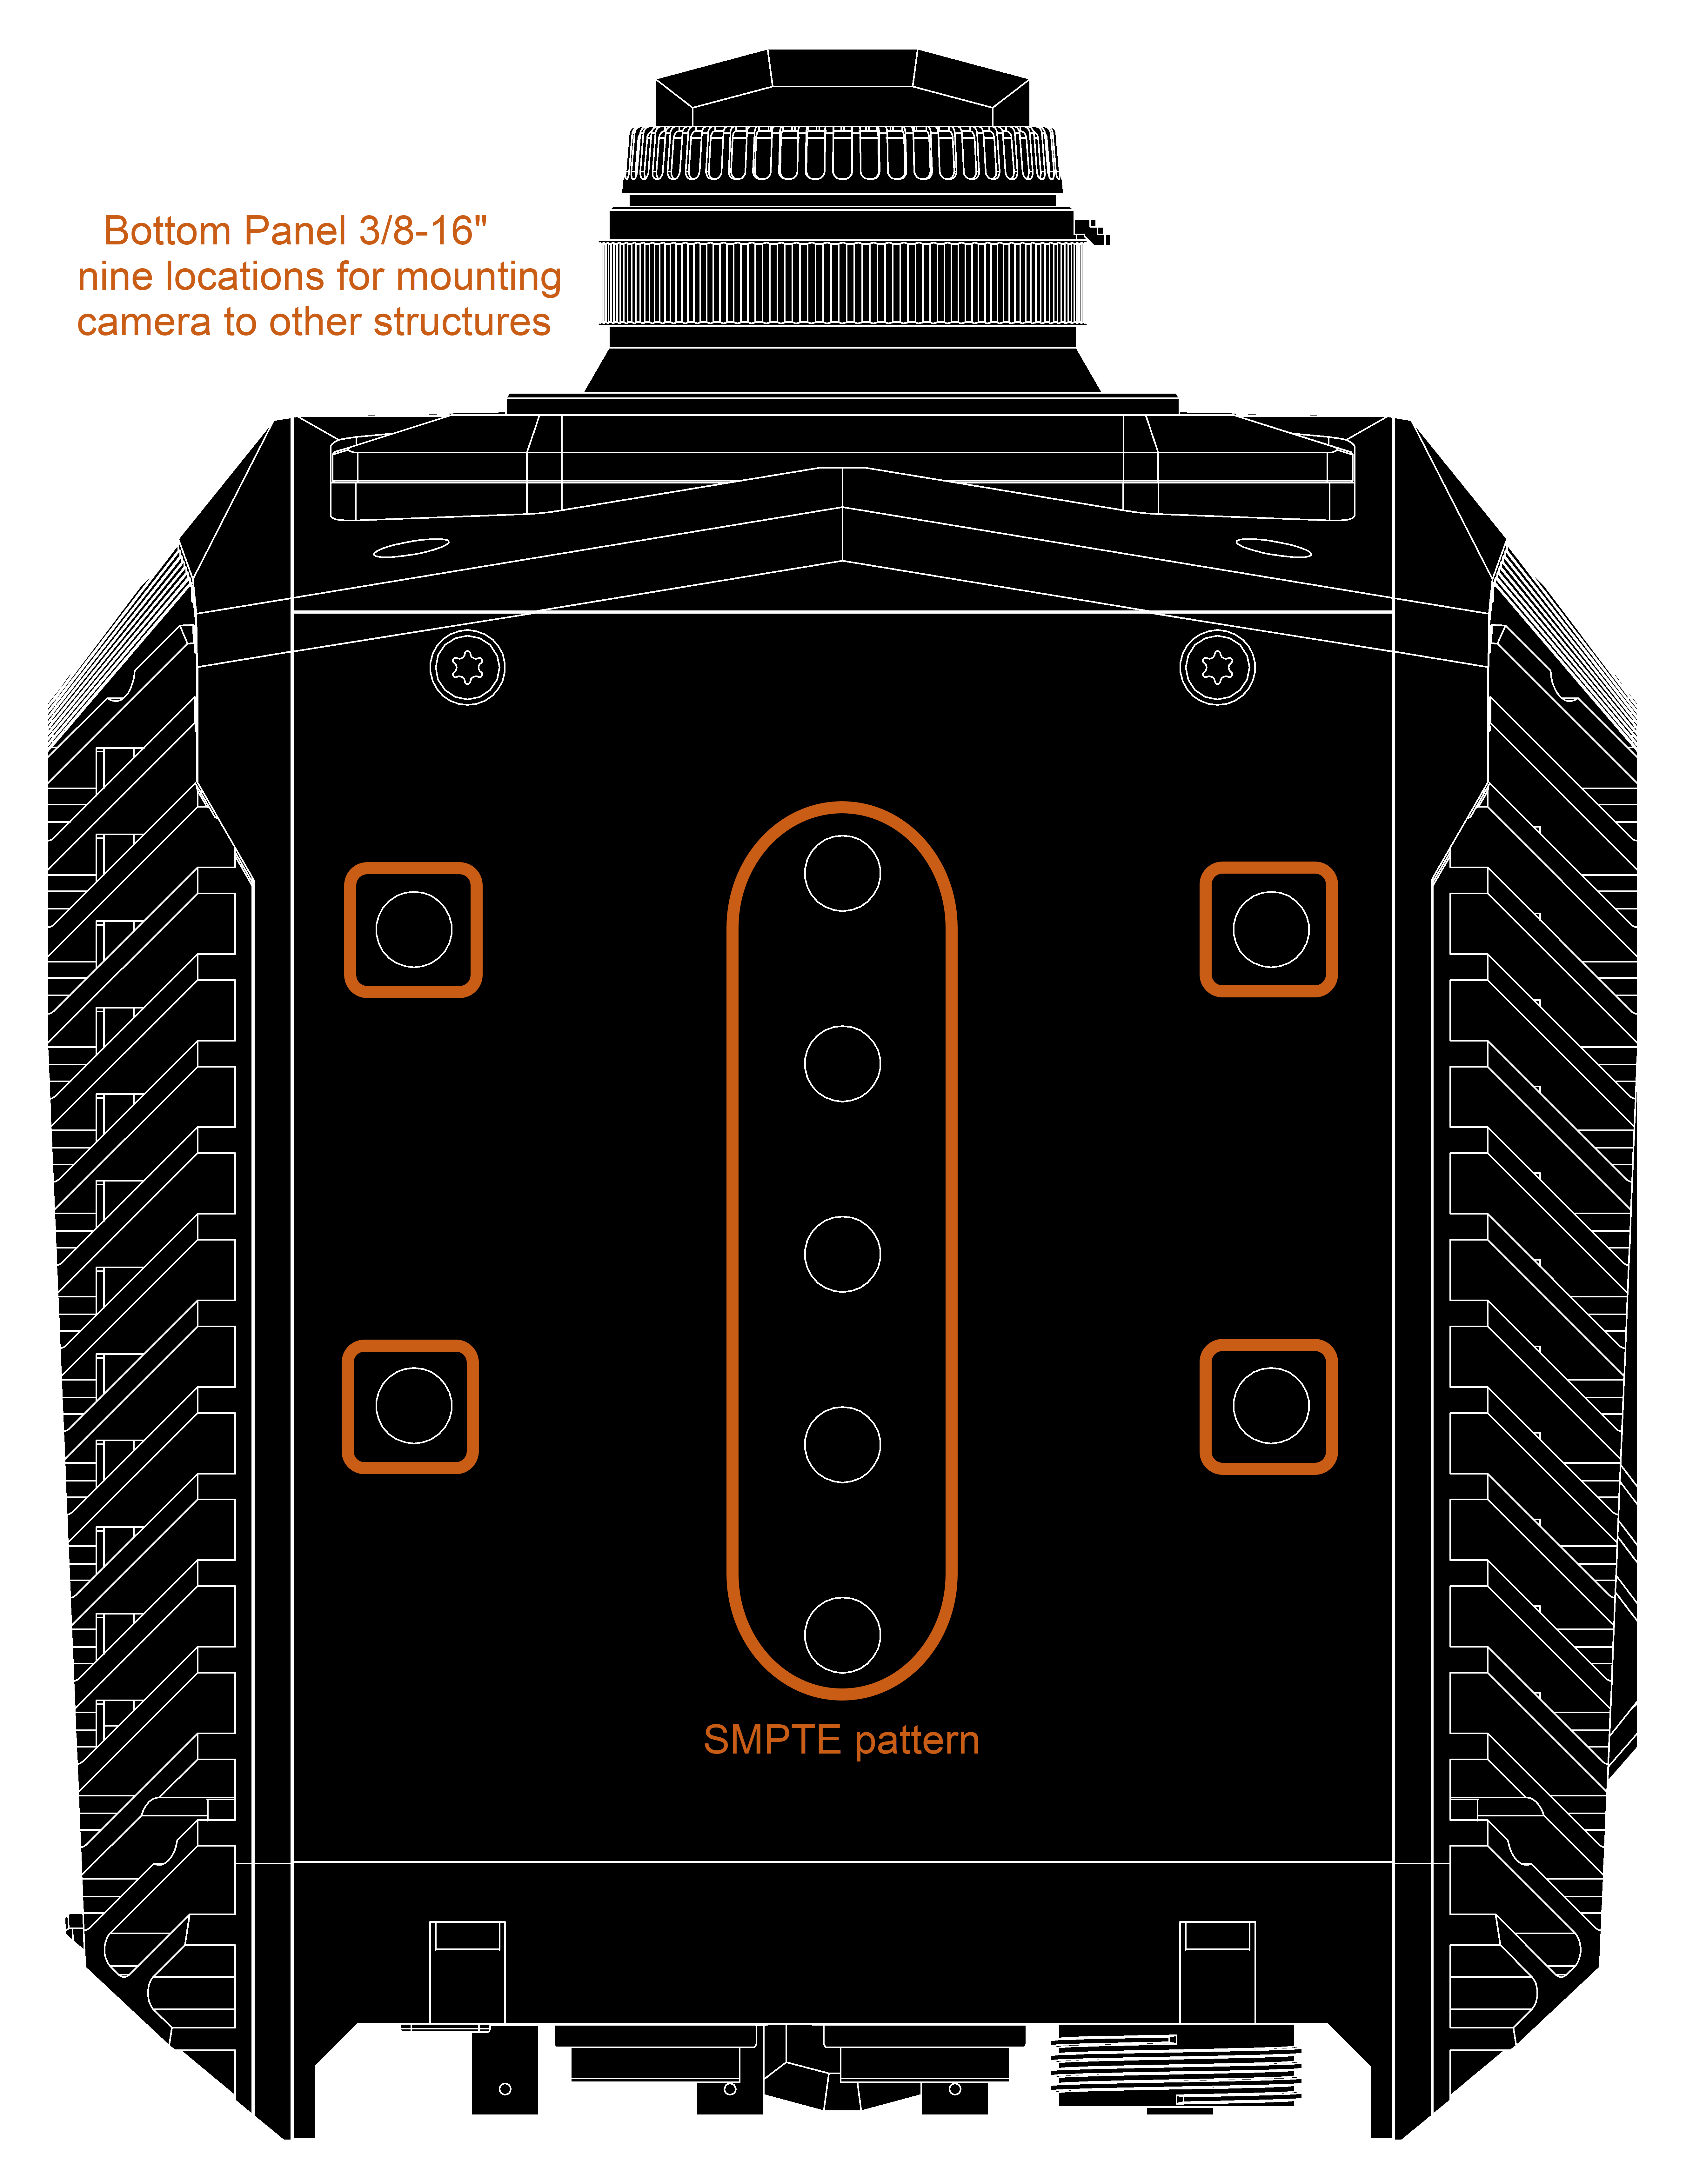
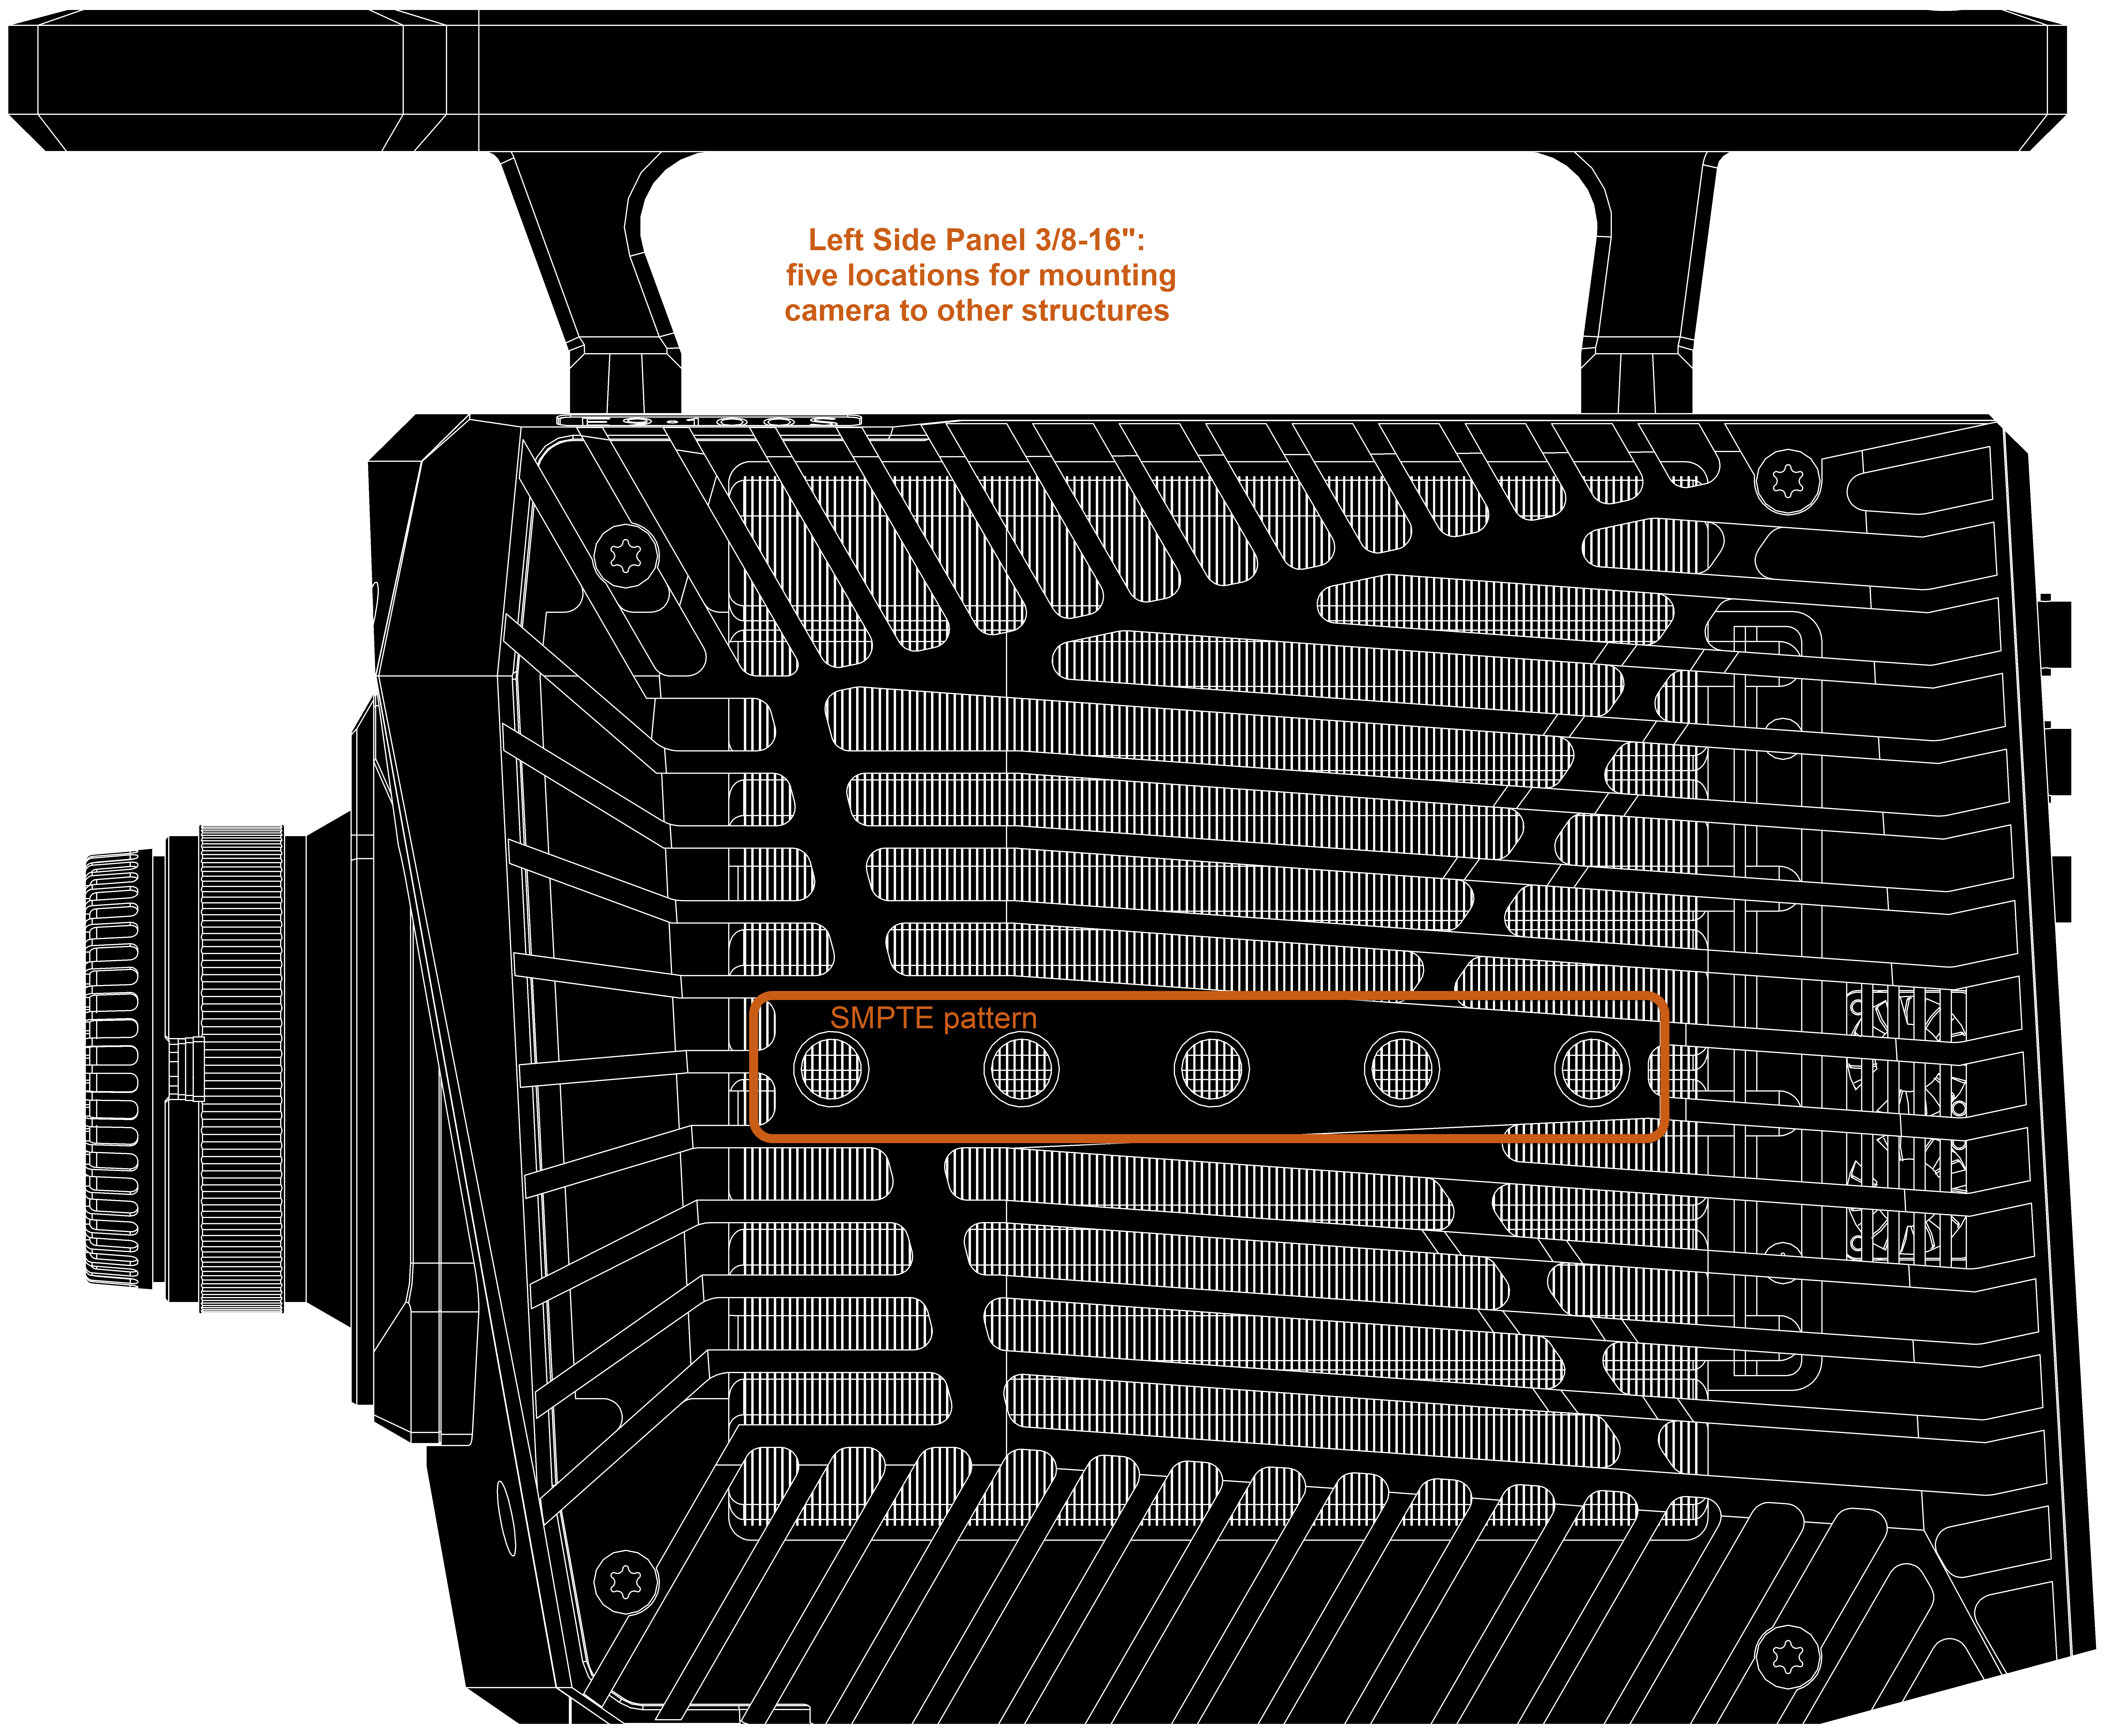
Both the bottom and the left side of the E9 have a SMPTE standard mounting pattern of 3/8-16” holes at 1” spacing. The position of these two patterns facilitates the camera to be positioned either with the sensor horizontal (normal) or vertical (side mounted). These are both aligned to the optical centerline of the sensor. They are suitable for attaching the camera when the respective surface is face down, and the weight of the camera is supported from below. Ideally, two 3/8-16” studs are used for any attachment to an underlying support structure or device.
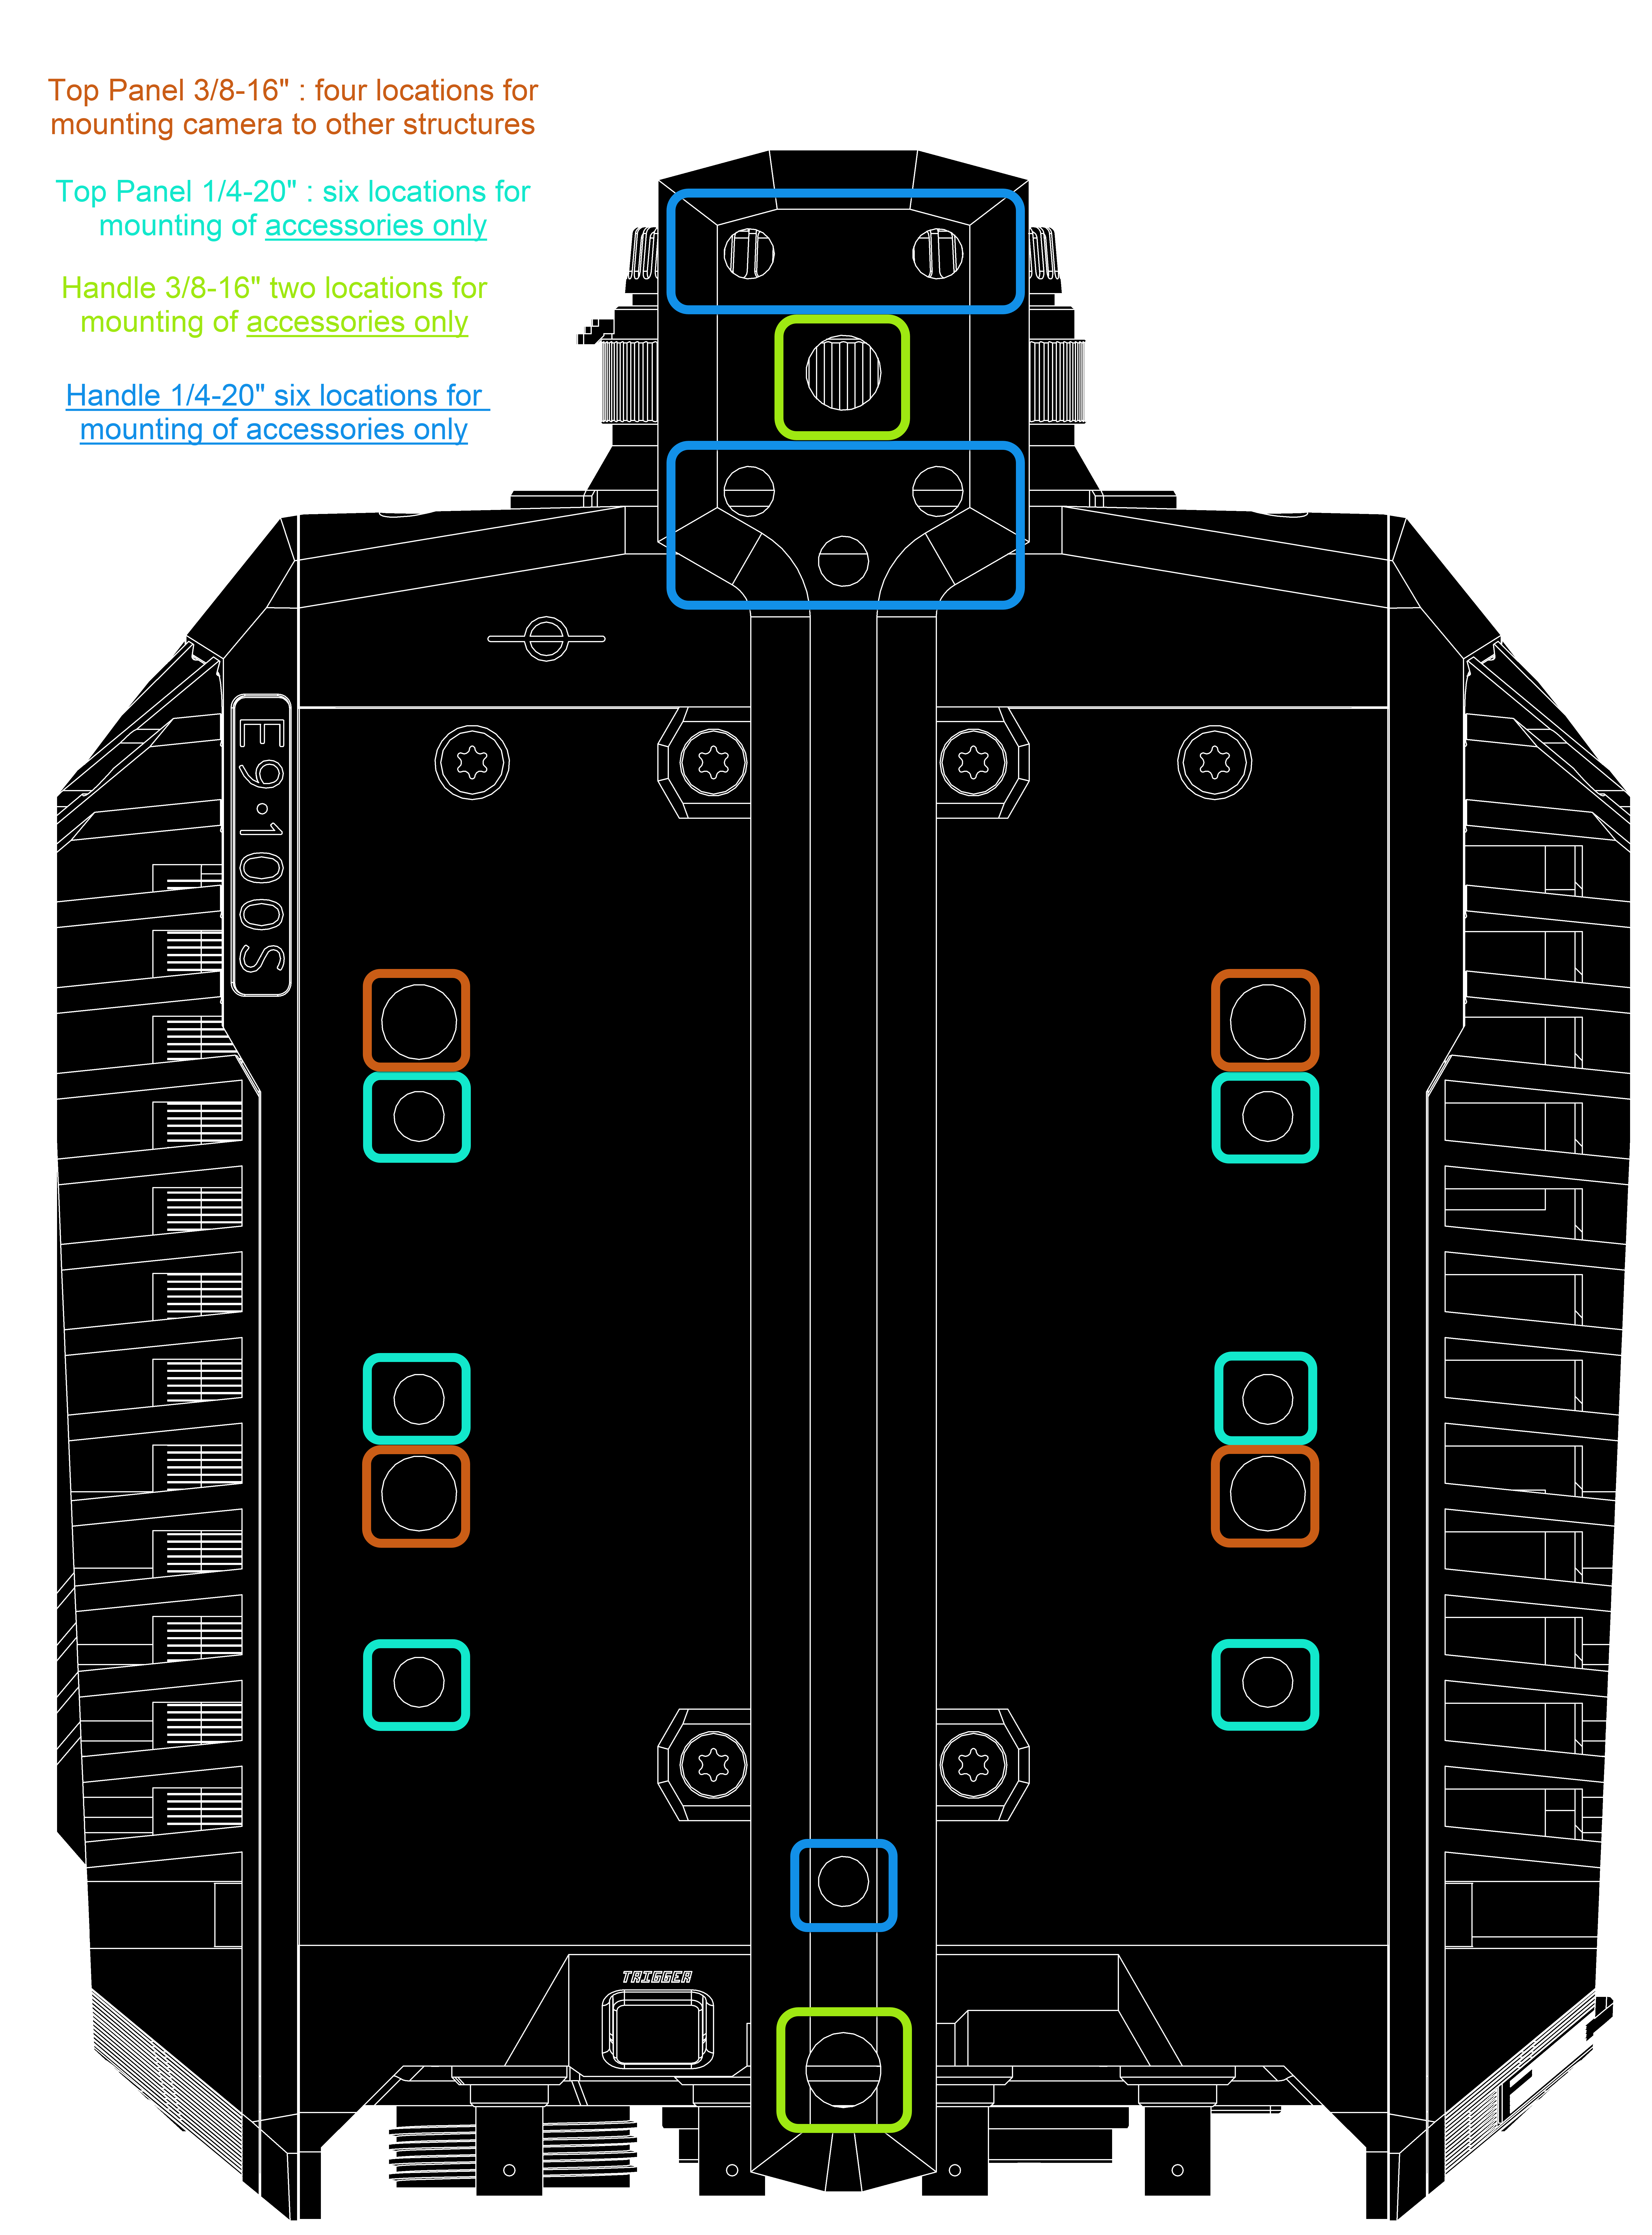
Also, on both the top and bottom, a pattern of four 3/8-16” holes is used for either under or vertical mounting. On the top, there are six ¼-20” holes for mounting accessories only.
Never use the side pattern to support the camera when orientated horizontally, always support the camera from below in this arrangement.


Handle
The handle is designed for both one- and two-handed carry of the E9. There are six size ¼-20” and two 3/8-16” holes in the handle for mounting accessories only. The handle is field removable, via four M5x12mm screws, by using a T25 driver.
Extra screws can be found in the shim kit. During re-installation, torque these screws to 30 in/lbs (3.3895 N·m)
Do not carry or transport an E9 with missing or loose screws in the handle.
Do not mount the camera by the handle to any apparatus at any time.
Tripod Mounting
Use at least two 3/8"-16 threaded studs when attaching the E9 to a tripod. Any tripod should have both the legs and head rated for a minimum of 30lbs (14Kgs). Consider the additional weight of any heavy or long lenses, or additional equipment mounted to the camera when selecting a tripod. Follow the tripod manufacturers’ instructions regarding setup, attachment, and balancing of the equipment.
Never use a monopod or bipod to support an E9.
Side Mounting
When it is desired to rotate the camera 90° from horizontal, place the left side (air intake) downward. Never mount or operate a camera with the right side (fan exhaust) downward. This position is OK for short term or occasional use. For long term or permanent use in this orientation, a side riser should be used to increase airflow.
Under Mounting
For all applications where mounting from the top is required, the handle must be removed. All mounting in this arrangement should utilize all four 3/8-16” holes on the top of the camera. A custom mounting plate may be necessary. Refer to the mechanical drawing for the bolt pattern.
Only use the 3/8-16” holes only for under mounting.
Vertical Mounting
For use cases where it is required for the camera to look downward, such as mounted to a microscope, custom bracketry is required. At a minimum, four of the 3/8-16” holes should be used for attachment, both top at bottom having two each. The bracketry should be designed to keep the E9 stable at all times.
The handle should remain in place during a vertical mount, to aid in the mounting / unmounting of the camera from the apparatus.