Navigation Pane
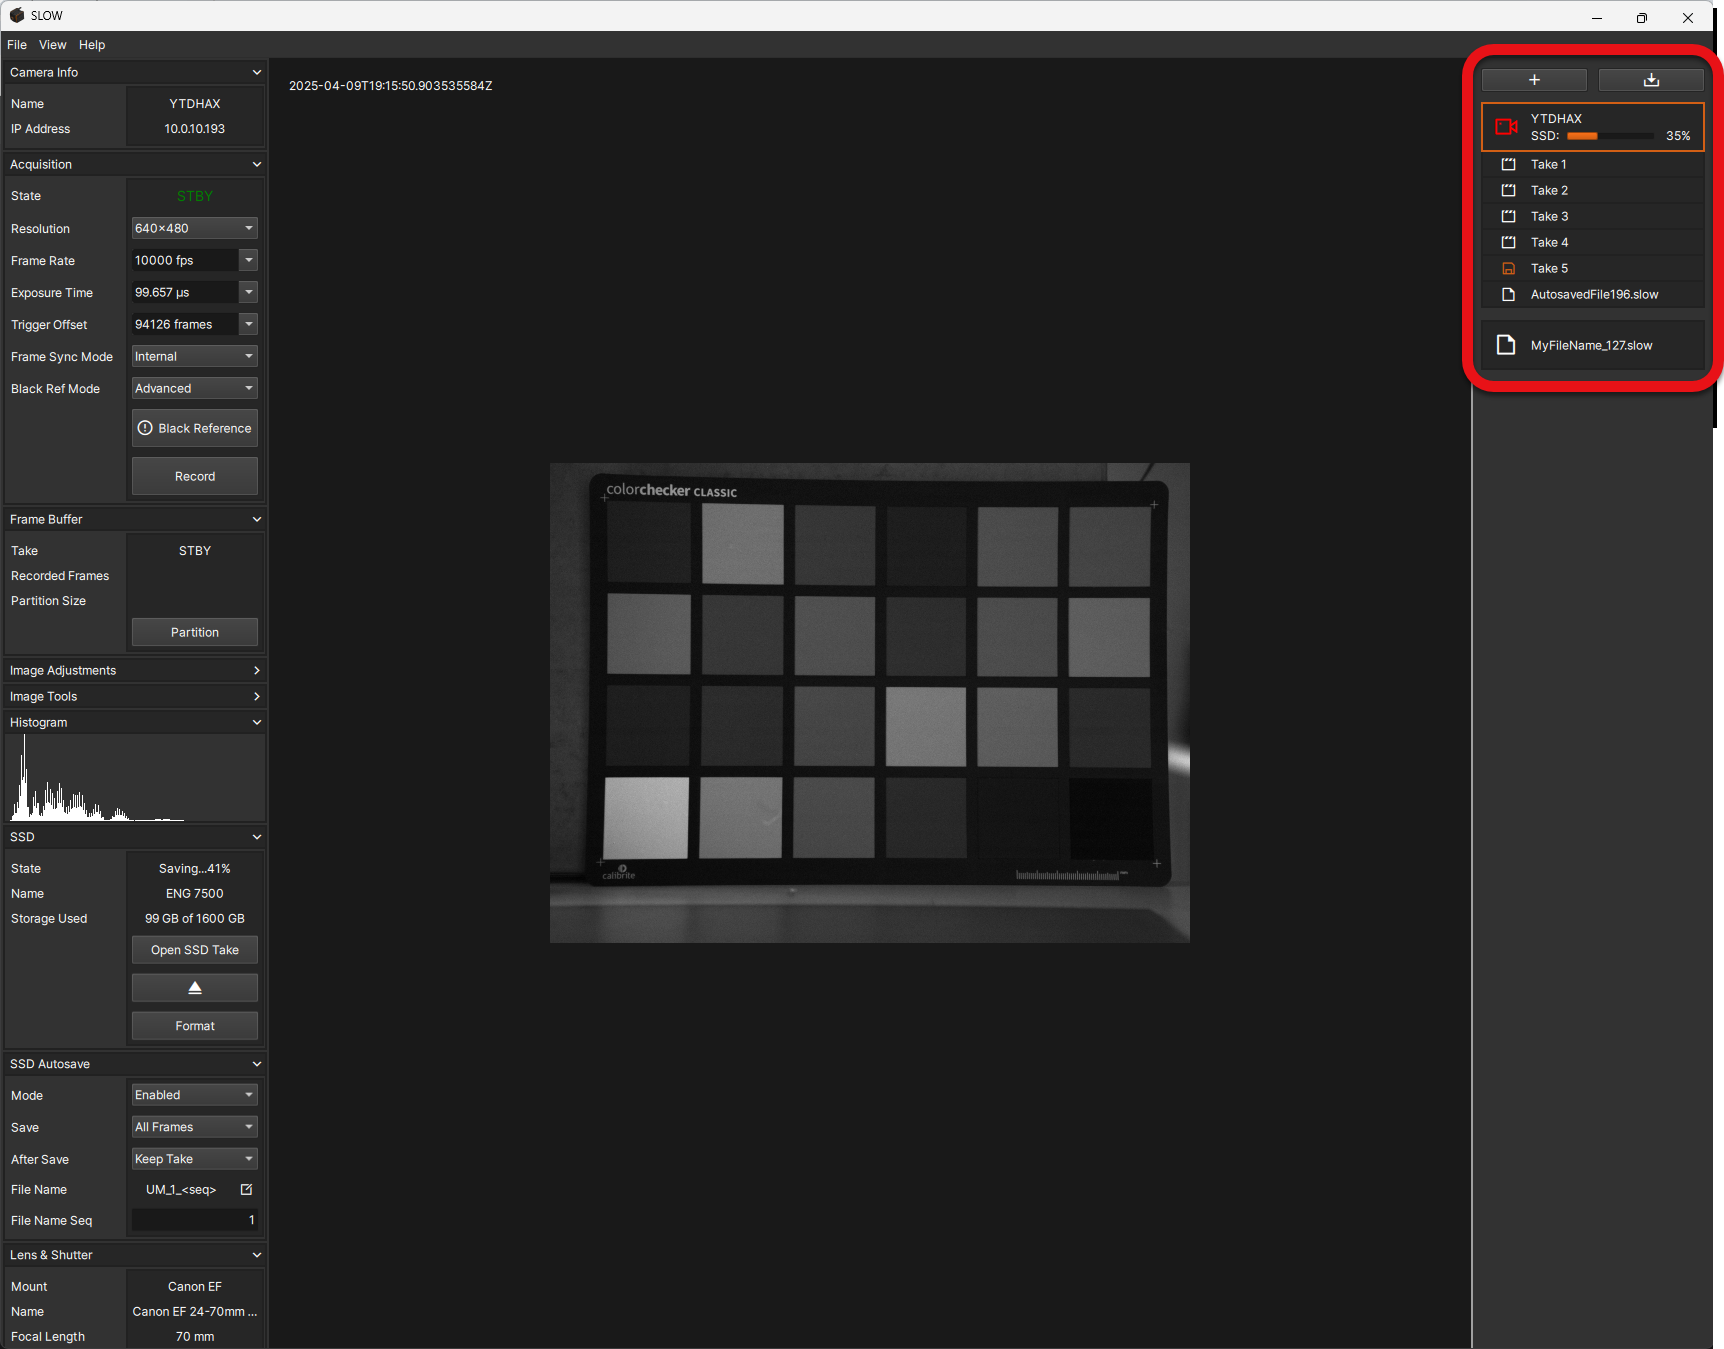
The Navigation Pane on the right side of the SLOW software provides access to E9 Cameras, their Takes, and SLOW Files that have been opened locally or from a Camera's SSD. An object can be selected by clicking on it, which will dynamically change the user interface to provide camera controls or playback controls. The currently selected object is highlighted with an orange box. The object tabs in view can be adjusted by clicking and dragging them up or down with the mouse, or by hovering over them and using the scroll wheel. Each object has a context menu which can be accessed by right-clicking on the object.
Buttons
Add Button
The Add Button ![]() opens a menu
to select an object to add:
opens a menu
to select an object to add:
| Menu Item | Description |
|---|---|
| Connect Camera... | Connect to a Camera for control, preview, and playback |
| Open SLOW File... | Opens one or more .SLOW files for playback |
Save Progress Button
The Save Progress Button ![]() switches the view to the Save Progress interface.
switches the view to the Save Progress interface.
Objects
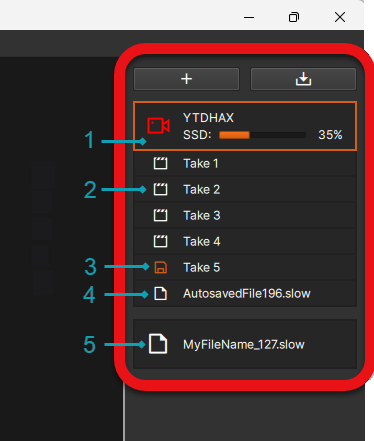
| # | Navigation Object |
|---|---|
| 1 | Camera |
| 2 | Take |
| 3 | Take (Saving) |
| 4 | SSD Take |
| 5 | SLOW File |
Camera
Camera objects represent each connected Camera. They are top-level objects which can have related Take and SSD Take objects nested underneath them. Each Camera object will display with the camera name and a colored camera icon to indicate it's acquistion state.
Clicking on a Camera object will change the user interface to camera controls and display all the relevent status and settings for the selected Camera.
| Acquisition State | Icon Color |
|---|---|
| Standby | White |
| Recording | Red |
| Triggered | White / Red (Flashing) |
SSD Save Progress
When a save to the Camera's SSD is in progress, a progress bar will be shown within the Camera object.

Context Menu
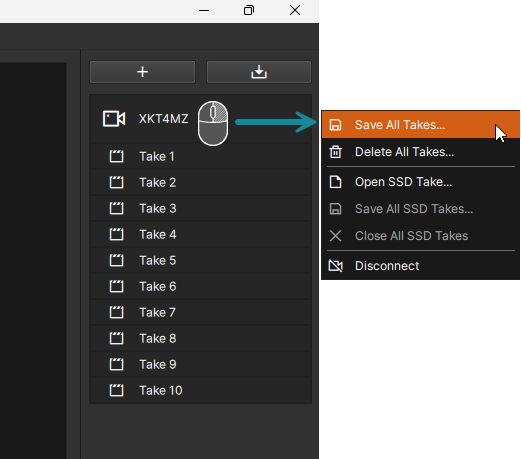
Right-clicking on the Camera object from the Navigation Pane will bring up its context menu:
| Menu Item | Description |
|---|---|
| Save All Takes... | Performs a Batch Save of all recorded Takes from the Camera |
| Delete All Takes... | Deletes all takes from the Camera |
| Open SSD Take... | Opens an SSD Take from the Camera |
| Save All SSD Takes... | Performs a Batch Save of currently open SSD Takes from the Camera |
| Close All SSD Takes | Closes all currently open SSD Takes from the Camera |
| Disconnect | Disconnects the Camera |
Clicking Delete All Takes... will display a confirmation pop-up. If OK is pressed, all data in the frame buffer will be immediately and permananetly deleted.

Take
Take objects represent each completed recording to a partition of a Camera's frame buffer. They are child objects of a Camera object, and are listed under the relevant Camera.
Clicking on a Take object will change the user interface to playback controls and display all the relevent status and settings for the selected Take.
Take icons will be higlighted when they are currently saving or queued to be saved ![]() .
.
Takes in this state are locked and cannot be deleted until the save operation is complete.
Context Menu
Right-clicking on the take object from the Navigation Pane will bring up its context menu:
| Menu Item | Description |
|---|---|
| Save... | Performs a Save of the Take |
| Delete... | Deletes the Take from the Camera's frame buffer |
Clicking Delete... will display a confirmation pop-up. If OK is pressed the data in the frame buffer will be immediately and permananetly deleted.

SSD Take
SSD Take objects represent SLOW Files that have been saved to a Camera's SSD, and opened for playback. They are child objects of a Camera object, and and are listed under the relevant Camera.
Clicking on an SSD Take object will change the user interface to playback controls and display all the relevent status and settings for the selected SSD Take.
Context Menu
Right-clicking on the SSD Take object from the Navigation Pane will bring up its context menu:
| Menu Item | Description |
|---|---|
| Save... | Performs a Save of the SSD Take |
| Close | Closes the SSD Take |
SLOW File
SLOW File objects represent locally-saved SLOW Files that have been opened for playback.
Clicking on an SLOW File object will change the user interface to playback controls and display all the relevent status and settings for the selected SLOW File.
Context Menu
Right-clicking on the SLOW File object from the Navigation Pane will bring up its context menu:
| Menu Item | Description |
|---|---|
| Save... | Performs a Save of the SLOW File |
| Close | Closes the SLOW File |